
ONX-W04
Aileron details and Assembly
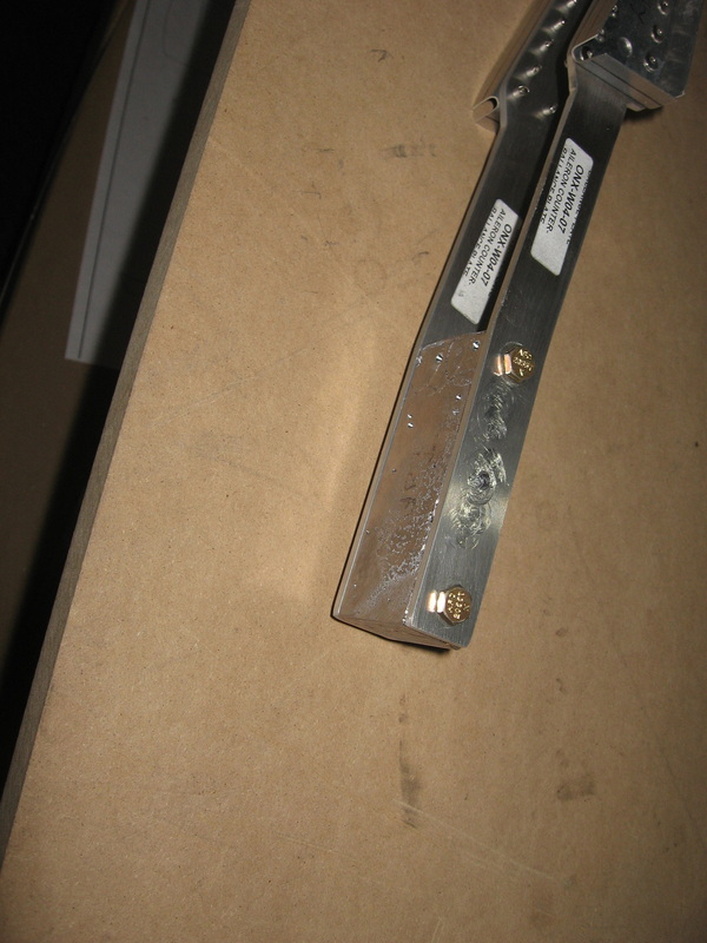
Cutting the slot to fit the Aileron Drive Plate

I used the drive plates to mark the extremes of the cut out,using a square.Make sure the rib is snug to the back of the aileron.
I then drilled a 1/8" hole at each end of the slot,as the slot is 1/8" wide.
Left aileron on left ,right in foreground.
Bottom up
I then drilled a 1/8" hole at each end of the slot,as the slot is 1/8" wide.
Left aileron on left ,right in foreground.
Bottom up
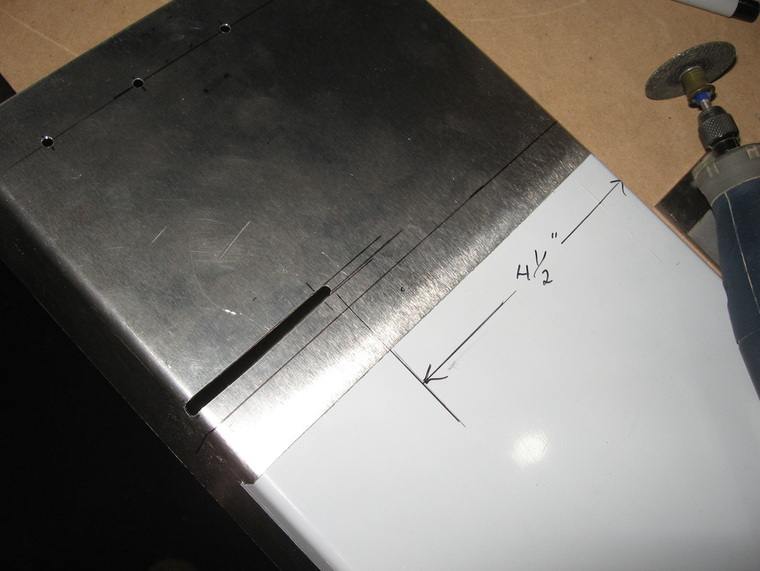
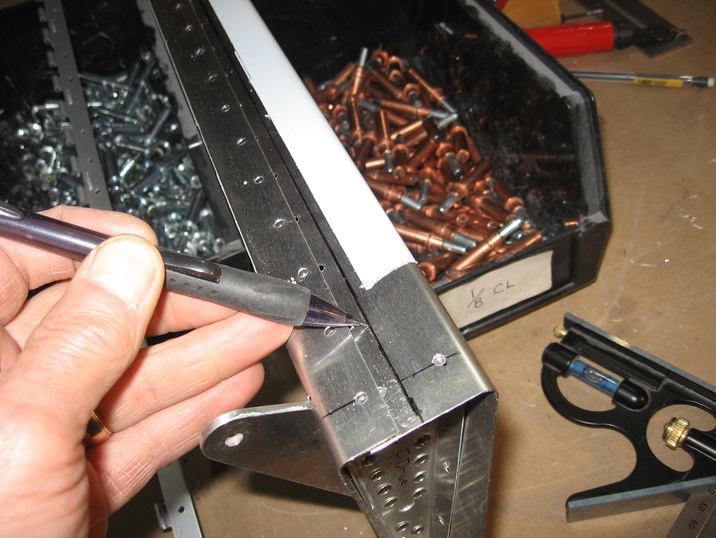
Used my Dremel to cut the slot between the holes and filed the bur's .
Note the distance to the end of the hole.
This will not be the same as called out in the drawing.The line about a 1/4" left of the end is the measurement given in the drawing but the drive plate will not fit if you cut to that line.
Note the distance to the end of the hole.
This will not be the same as called out in the drawing.The line about a 1/4" left of the end is the measurement given in the drawing but the drive plate will not fit if you cut to that line.
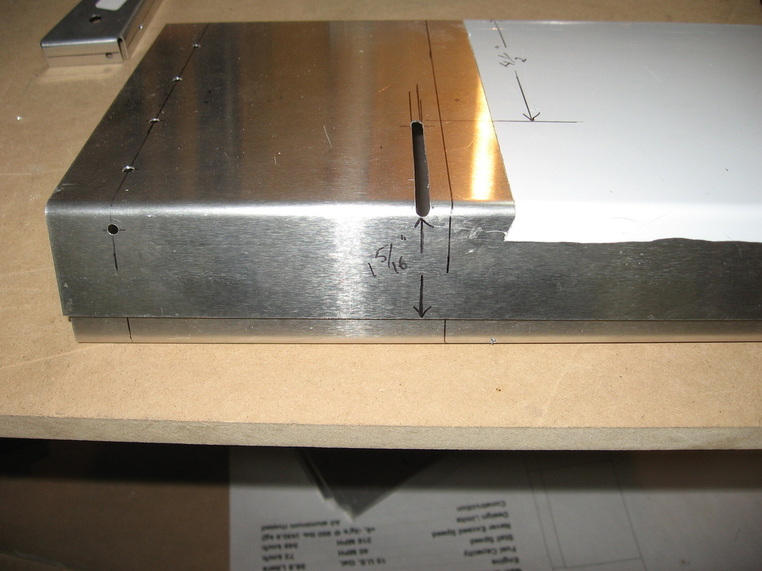
Note distance from edge.
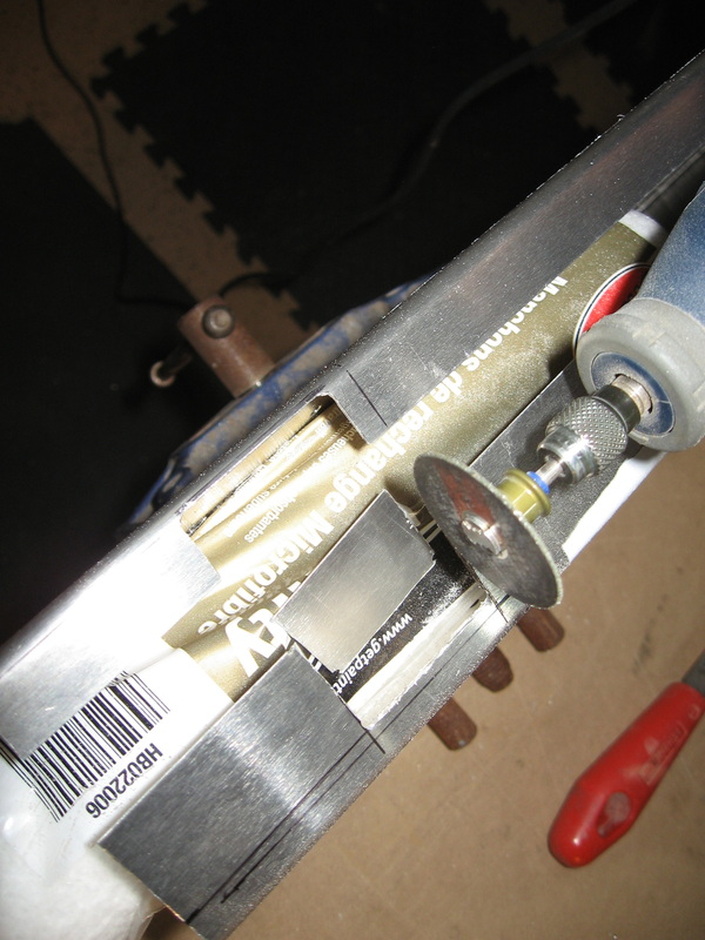
Next-Dealing with that lead block they gave you
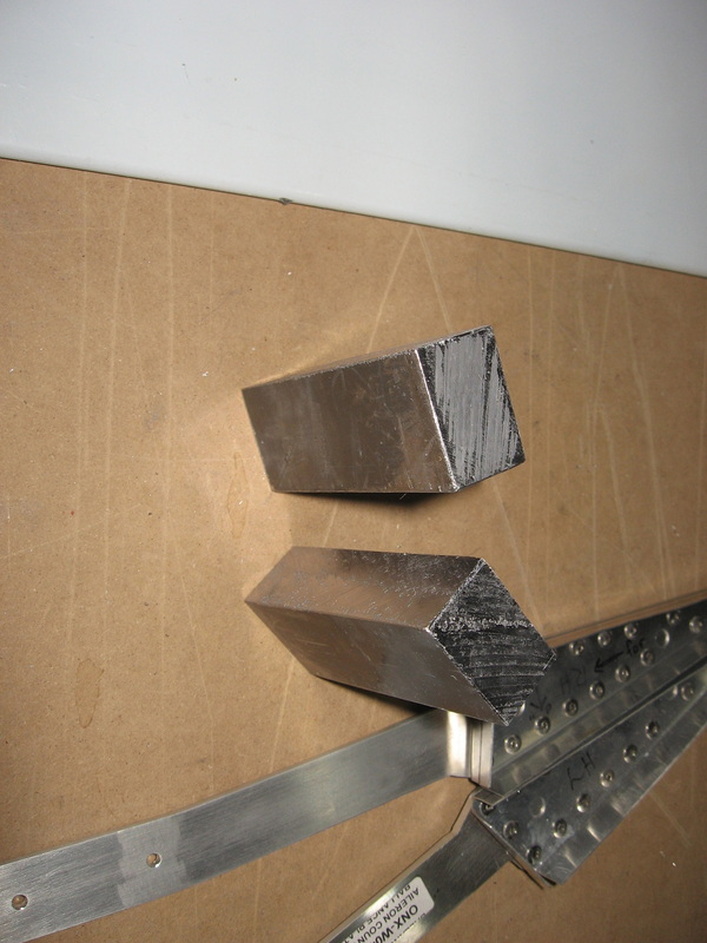
I cut the lead block with my table saw.No problem at all if you cut it very slowly.I did this with an 80 tooth carbide blade
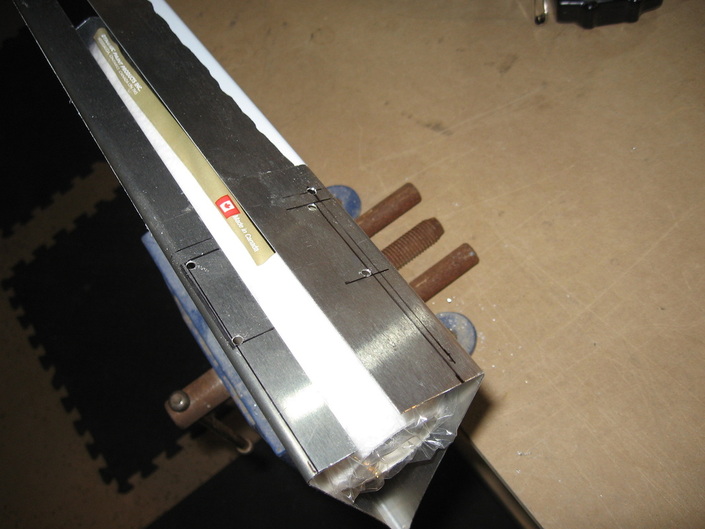
Drilling the holes is a challenge.
First I up drilled the arms to 3/16"
Then I clamped the lead between the counterbalance arms and very slowly started drilling the first hole.I would drill down slow till the lead came up the spiral of the bit then I would withdraw the bit and clean of the shaving,then go at it again.I repeated this over and over till I was about half way through then I flipped it over and started the same process over again till the 2 holes met.Then put a bolt through to hold it tightly in place and start the next hole.
Don't try to drill all the way through from one side ,as you will probably break your drill bit in the lead.Please don't ask how I know this!!!!!
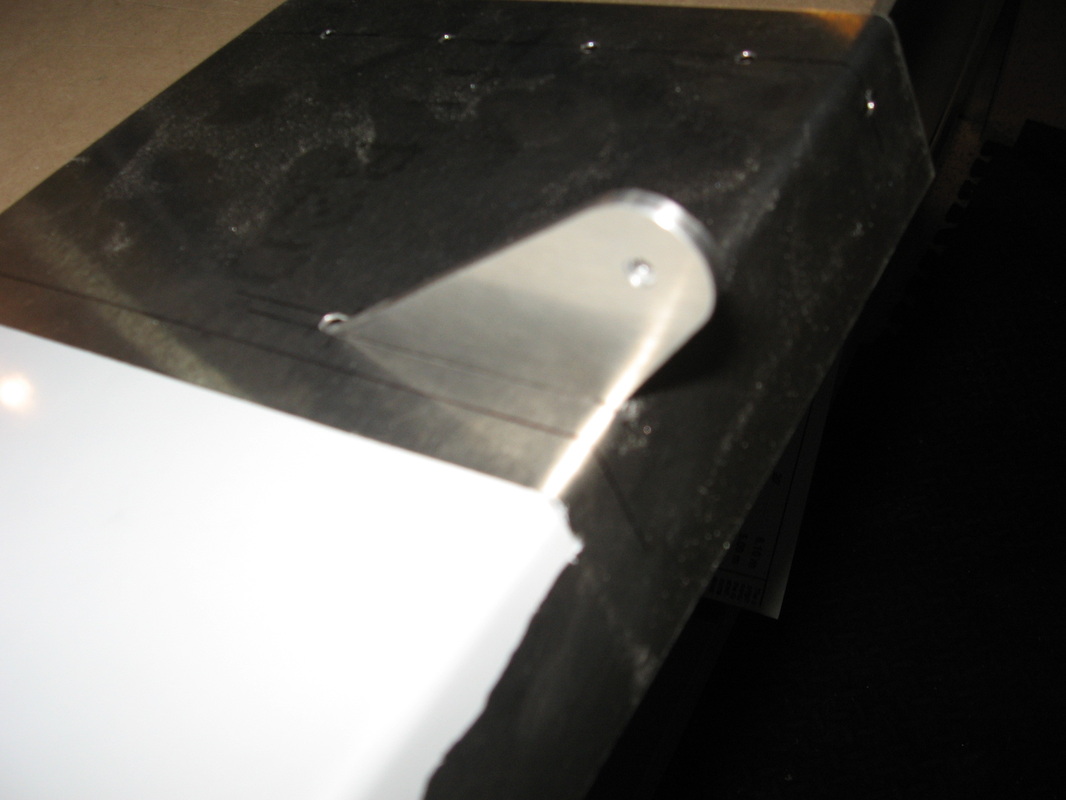
Cut out for counter balance
Again I used the counter balance assembly from above to mark the upper and lower extremes.The width I took from the drawing.Then drilled the corners with a 1/8" bit
Cut between holes,leaving the corners rounded.Then file burs.
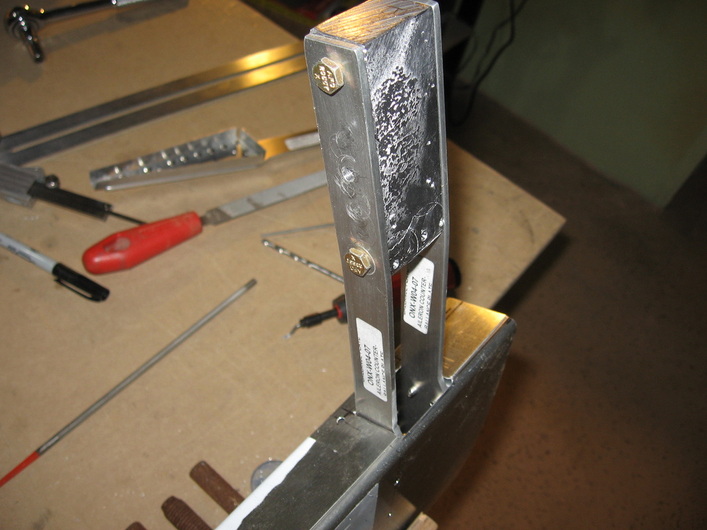
…..happy with the fit :8-)
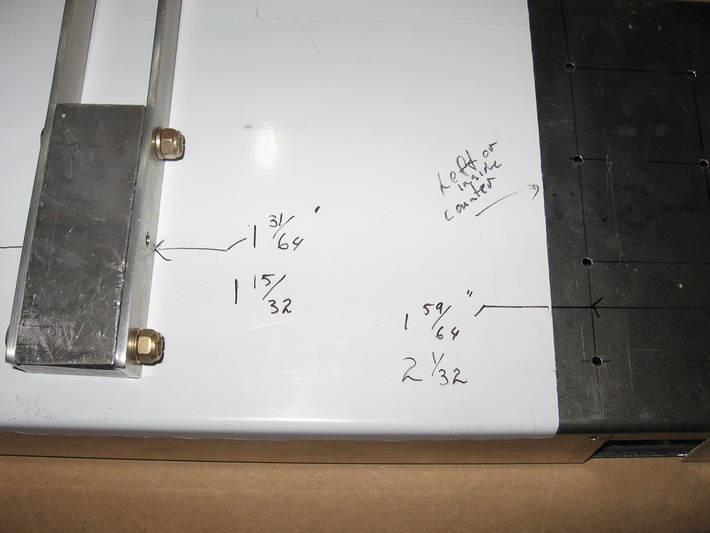
Just a note about dimensions.
I drilled the second row of rivet holes on the right based on my actual assembly not with the drawing dimensions.
Though they are close ,the upper figures being the actual sizes and the lower numbers from the drawing.
I would wait as I did to drill the rivet holes on the right until you have your assembly finished and use it as your guide.
Drilling the hinge.Clecoed it right to the bench as I moved along .
Ready for up drilling.
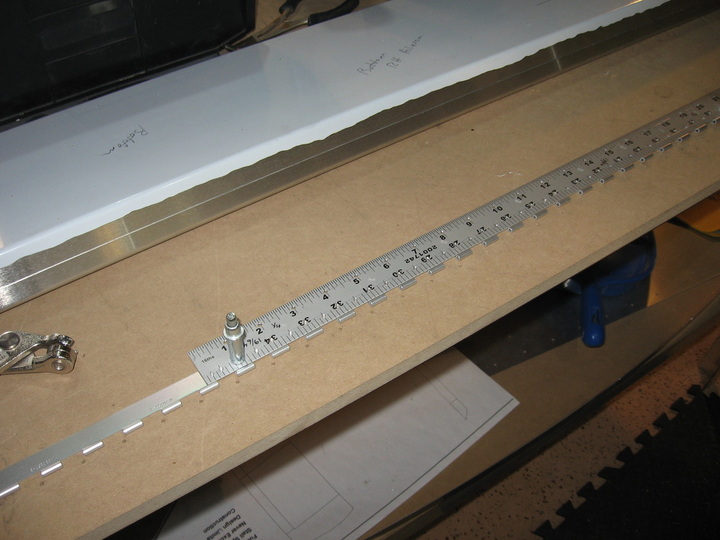
I used the aluminum ruler above under the hinge to set the distance not exact but close enough.
I used the aluminum ruler above under the hinge to set the distance not exact but close enough.
ONX W06 FLAPS
I found attaching the hinge a bit challenging.On the first flap I wound up with a few elongated holes so for this one I marked where the top of the bend should be by placing the rib in both ends and making a mark .Then i joined the 2 marks .The hinge essentially lies almost even with that edge so now it's a matter of lining up the bottom edge with that line drawn and the hinge also on that line and start with a 1/16" bit and drill the first hole ,add a cleco and then do the other end then one in the middle.
Now just continue drilling from one end and add a cleco before drilling the next which prevents the inner edge from bending back as the bit contacts it.This of course requires very sharp bits.
Worked perfectly.
Now just continue drilling from one end and add a cleco before drilling the next which prevents the inner edge from bending back as the bit contacts it.This of course requires very sharp bits.
Worked perfectly.
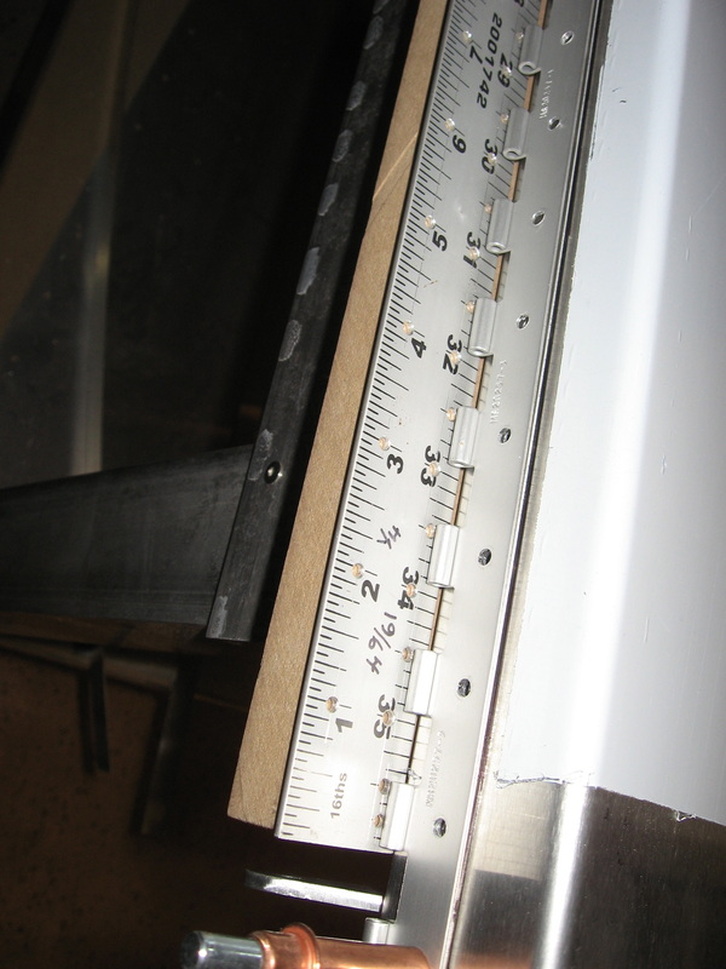
The aluminum yard rule I have just happens to be the 1/16" required to start those 3 beginning holes.
I should also add that I moved a rib to the center before I drilled that middle hole as it was easier to keep everything lined up.
I should also add that I moved a rib to the center before I drilled that middle hole as it was easier to keep everything lined up.
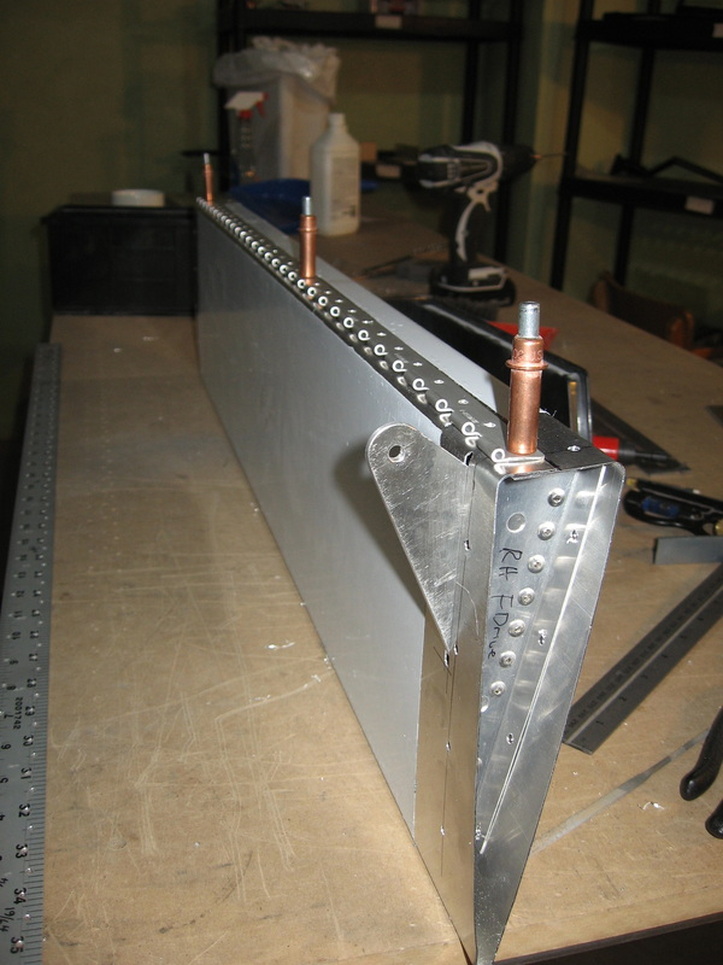
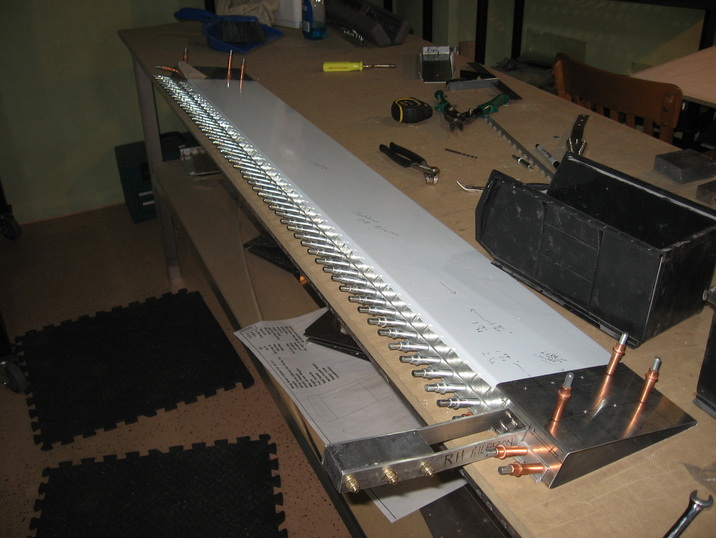
After those 3 holes were drilled I was able to stand it this way to drill the rest,adding a cleco after each one was drilled.
The flap drive cutout was done the same way as the Ailerons.
The flap drive cutout was done the same way as the Ailerons.