
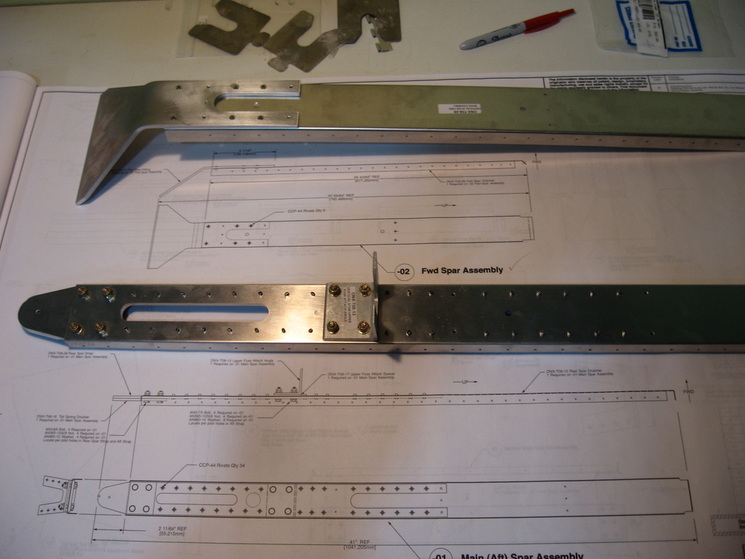
Forward Spar assembly(vertical)
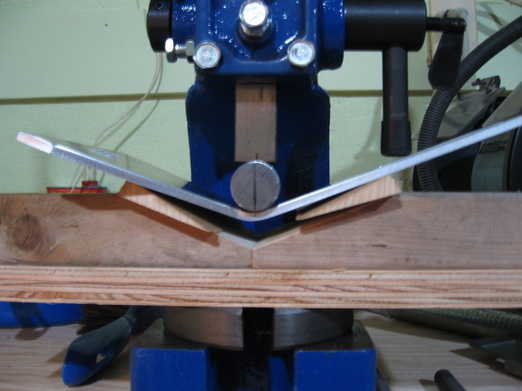
Another bend .This time to 40*.Plans call for 1/2" radius so I used a 1" steel bar.Again cut 2 2x4 pc's to 20* and had to use the same 2 cutoffs from my earlier bend to gain more angle.
Pretty straight forward .
Pretty straight forward .
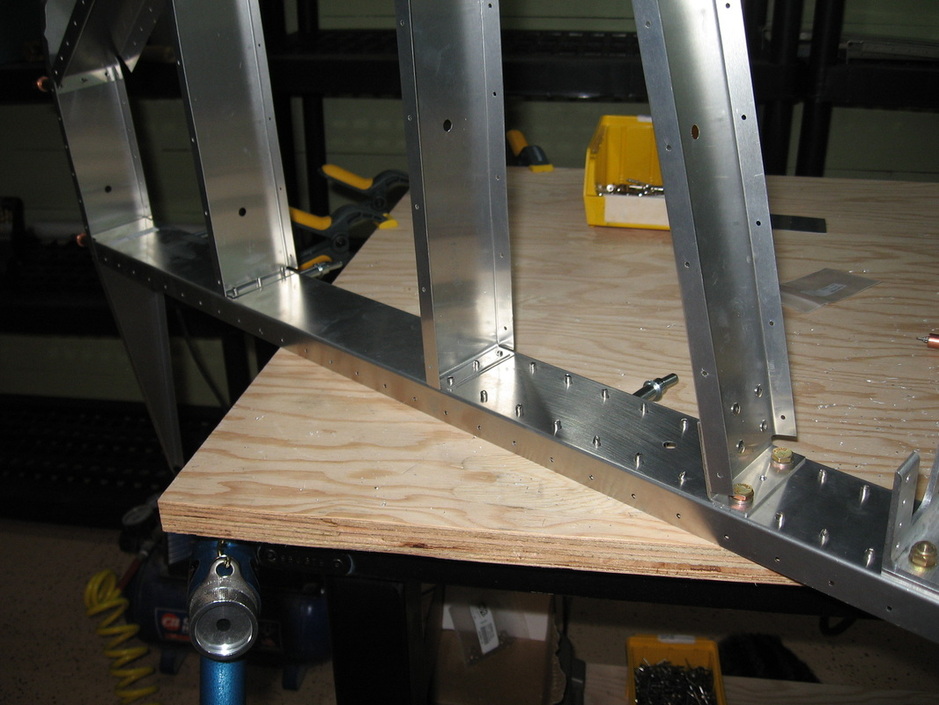
Aft Spar assembly
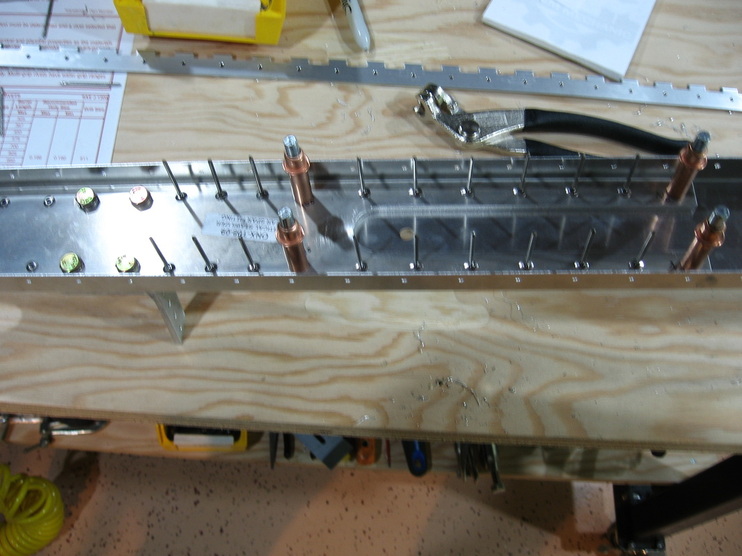
Riveting the aft spar to the channel.Note the cleco's where the ribs will attach so no rivets
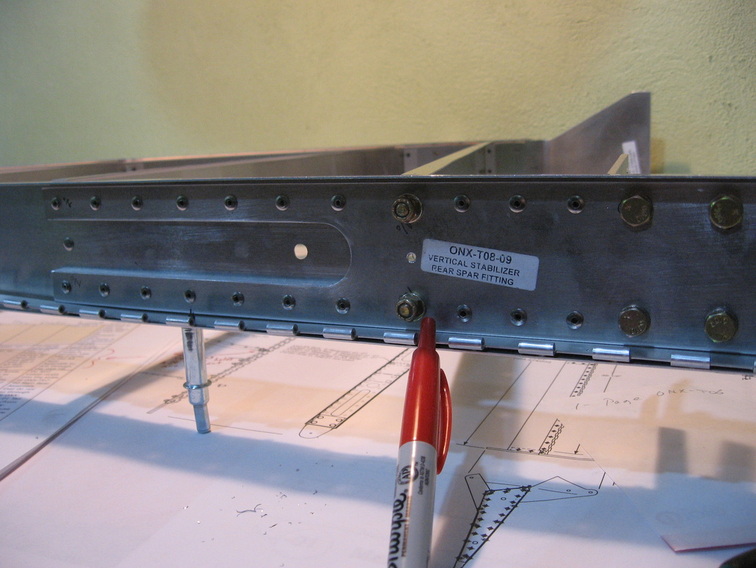
I had to order 4 -AN3-6A bolts for the front of the spar.They are called for in the drawing but were not in the inventory list.No big deal.
I had to order 4 -AN3-6A bolts for the front of the spar.They are called for in the drawing but were not in the inventory list.No big deal.
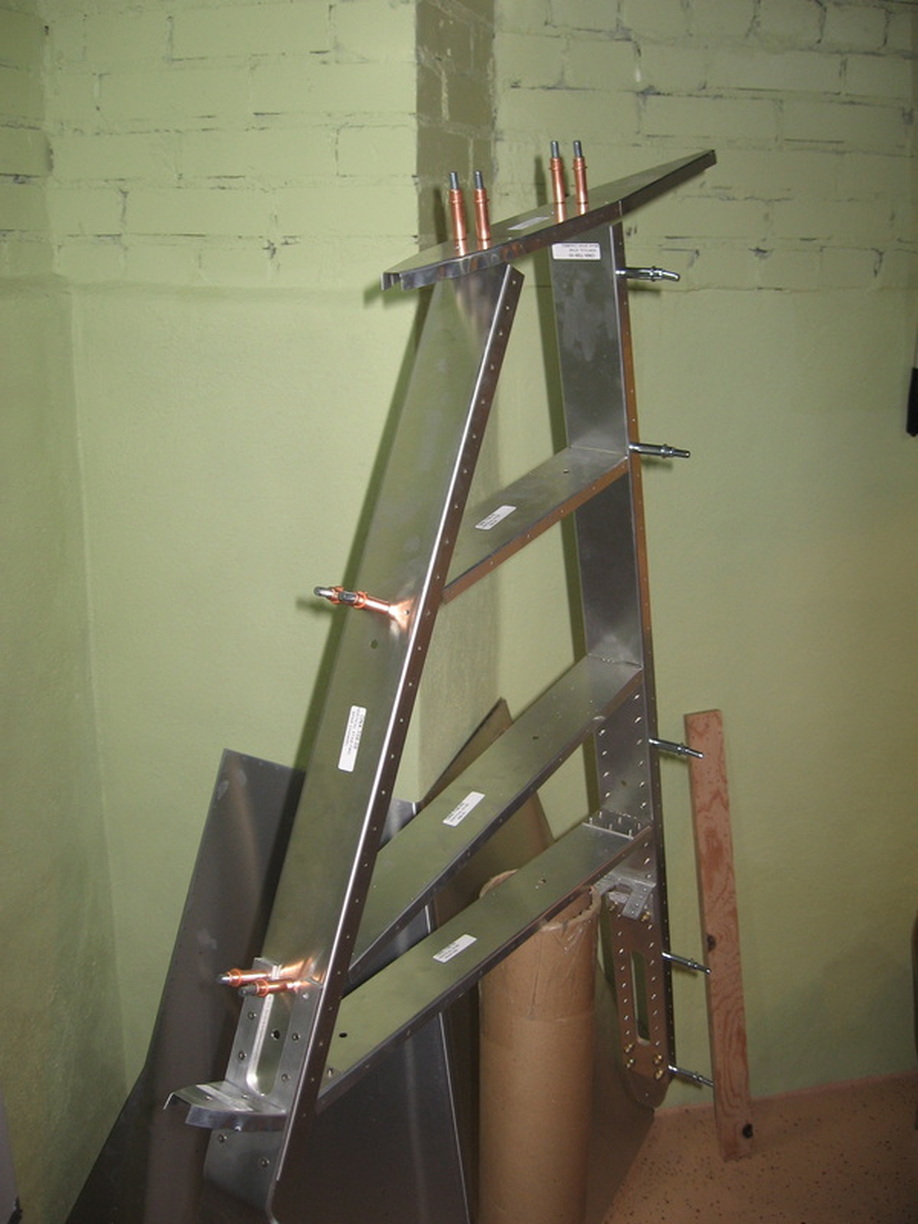
ONX -T07 Vertical Tail Assemblies
All in all there was nothing on this page that was confusing or hard to do.Just remember to deburr all the parts and holes before riveting.I used a #12 drill bit for the an bolt holes and did them on my drill press.(up drill to #12,don't go directly to the #12 bit)I wound up with a snug fit and no play in all the bolt holes.
Page ONX-T06 Vertical tail assembly
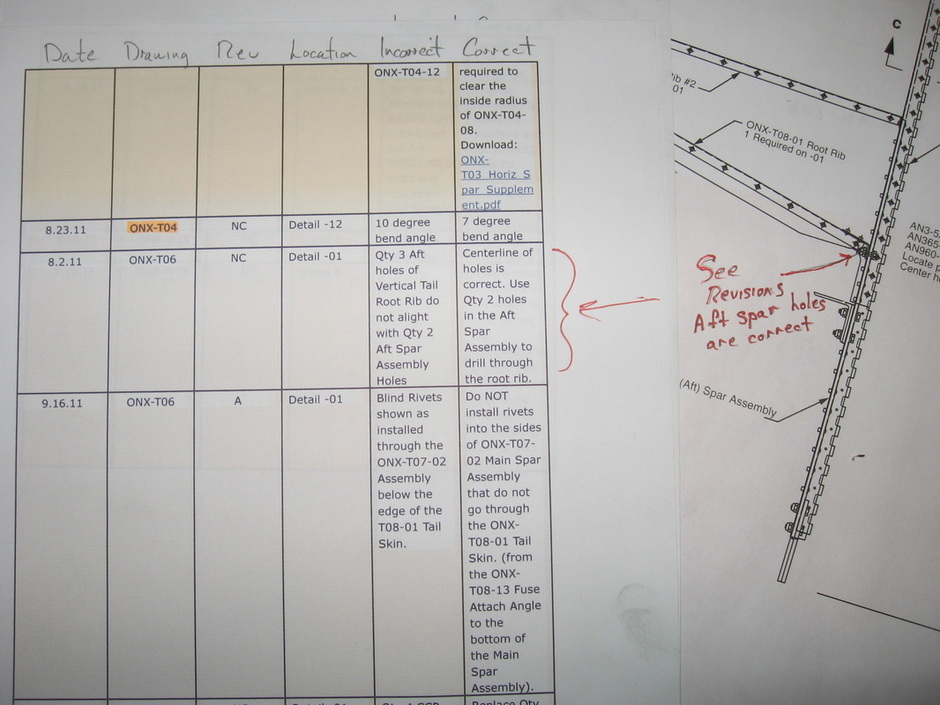
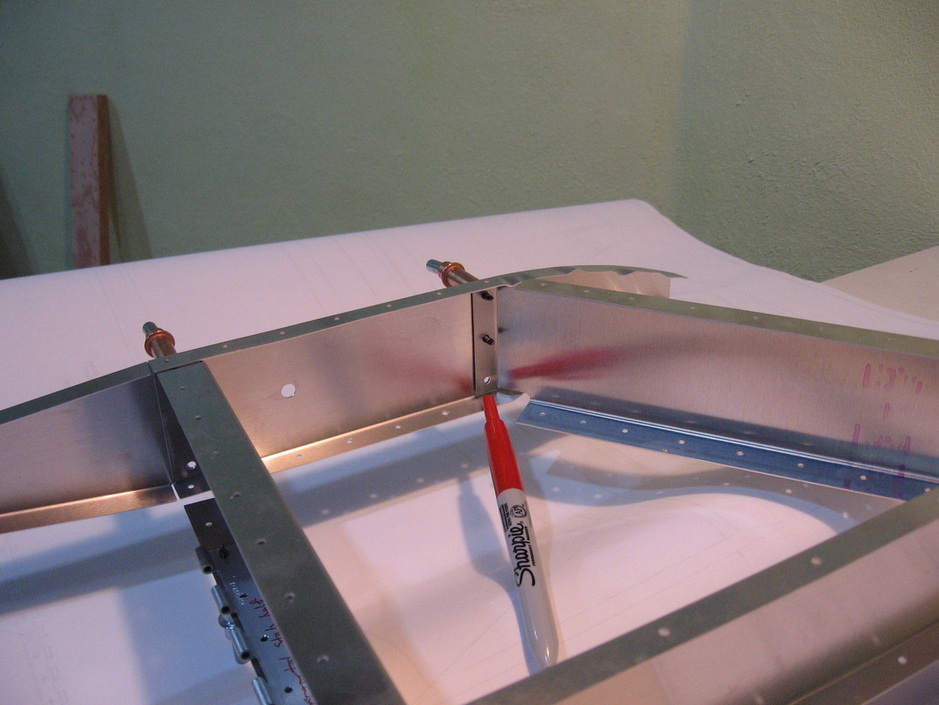
This is the revision to look out for.The holes in the root rib are wrong so you have to use the holes in the aft spar to drill the correct holes through the rib.The first problem is centering the rib on the aft spar.I drew a line on the channel spar connecting the 2 holes then I located the exact center between these holes and made a scratch on the channel intersecting the line drawn.I then positioned the rib on the channel and centered the center hole over the mark I made on the channel,held it firmly and used the hole in the rib to drill through the spar.This I then clecoed and was now able to drill through the spar into the rib to locate the holes in the rib properly.I then updrilled with a #12 bit for the bolt holes .Using the center hole in the rib allowed me to place the rib exactly where it belongs .
Root rib to spar
The holes in question.Notice the center hole drilled for location purposes.Once you see it you will also realize that the center hole is the key to getting it located in the right place.
Then again you might find a better way :)
Then again you might find a better way :)
Putting it together
After the revision was dealt with and attached using 2 AN bolts I riveted the other 2 ribs in place(Don't rivet ribs yet)see below
Attaching the forward spar
Pretty straight forward now .Here everything is clecoed in place ready for rivets.(Don't rivet yet)see below
Tweaking
I had to lessen the bend where the forward spar channel meets the Tip rib.I hope it doesn't mean I've done something wrong!!! I don't think so but I'll know when I put the skin on.
Problems with putting the skin on the Vertical stab
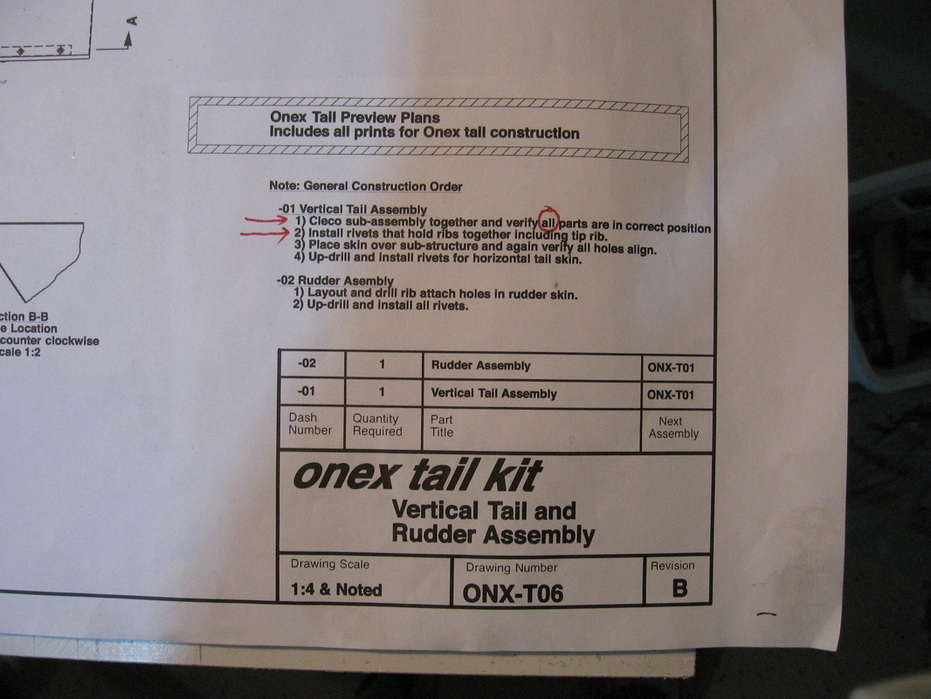
In the above it states 1) Cleco sub-assembly together and verify all parts are in correct position.I mistook this to mean everything except the skin.Because I had riveted the ribs in place before checking the skin position I could not get the skin to line up with all the holes I could get 2 sides right but the third eluded me.That's when I reread this and realized I was not supposed to rivet the ribs in place.It makes the whole assembly to rigid,so I dilled out most of the rivets holding the ribs to the spars and backed off the 2 bolts also.Now when I put the skin over the assembly I was able to line all the holes up and put clecos in to hold it all together.I then up-drilled all the holes both sides .I then took the skin off and deburred everything both sides,put the skin back on and riveted the hinge side only.The other side is just clecoed so that it can be opened up for inspection.
The learning curve here will serve me well when I do the wings.Don't rivet anything till everything lines up including skin ,the way it is supposed to and can be clecoed without straining anything.
The learning curve here will serve me well when I do the wings.Don't rivet anything till everything lines up including skin ,the way it is supposed to and can be clecoed without straining anything.
Gadzooks I did it !!!
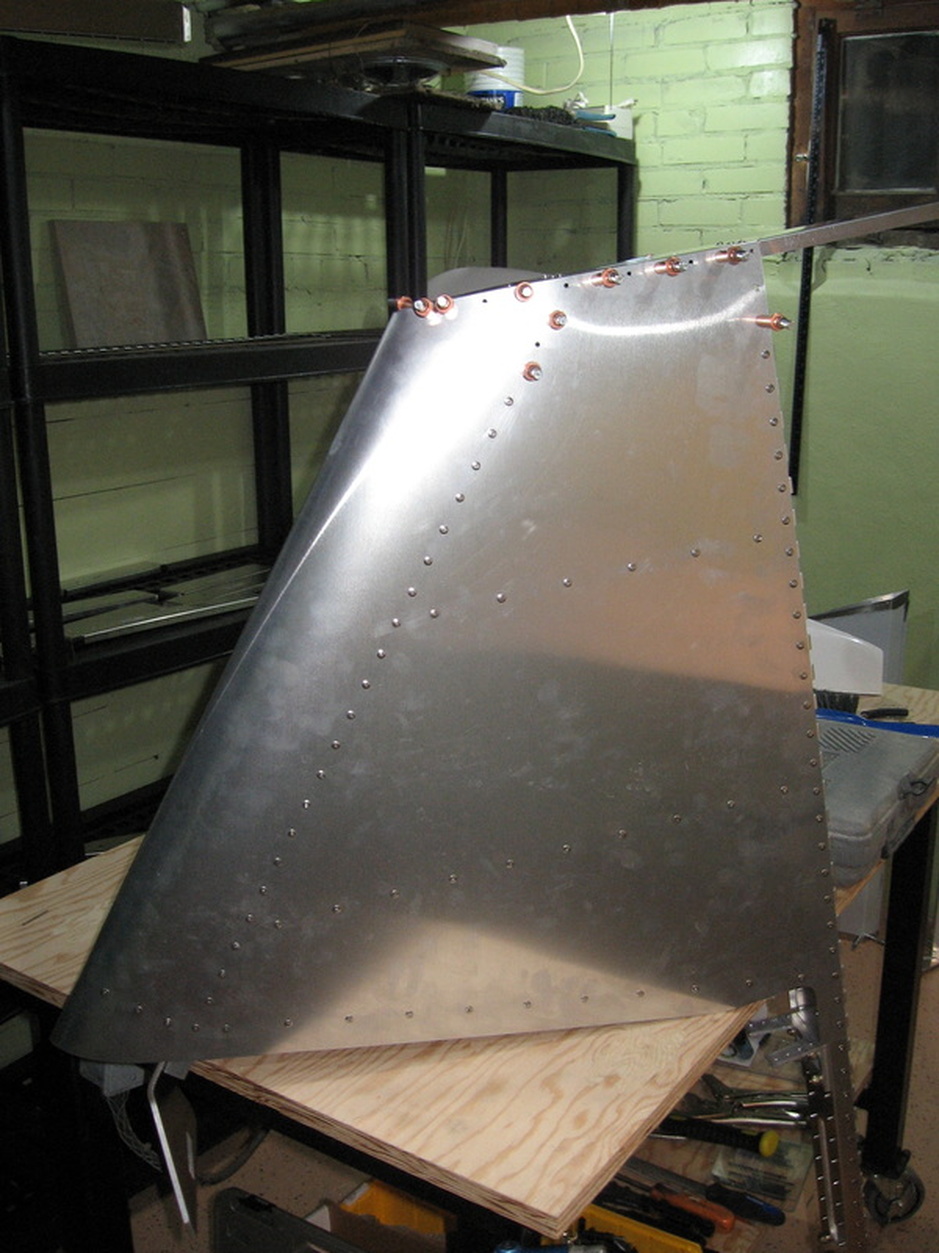
The top is not riveted because the fiberglass tip has to slip under the skin.I'm leaving it off for now until I attach the rudder .