
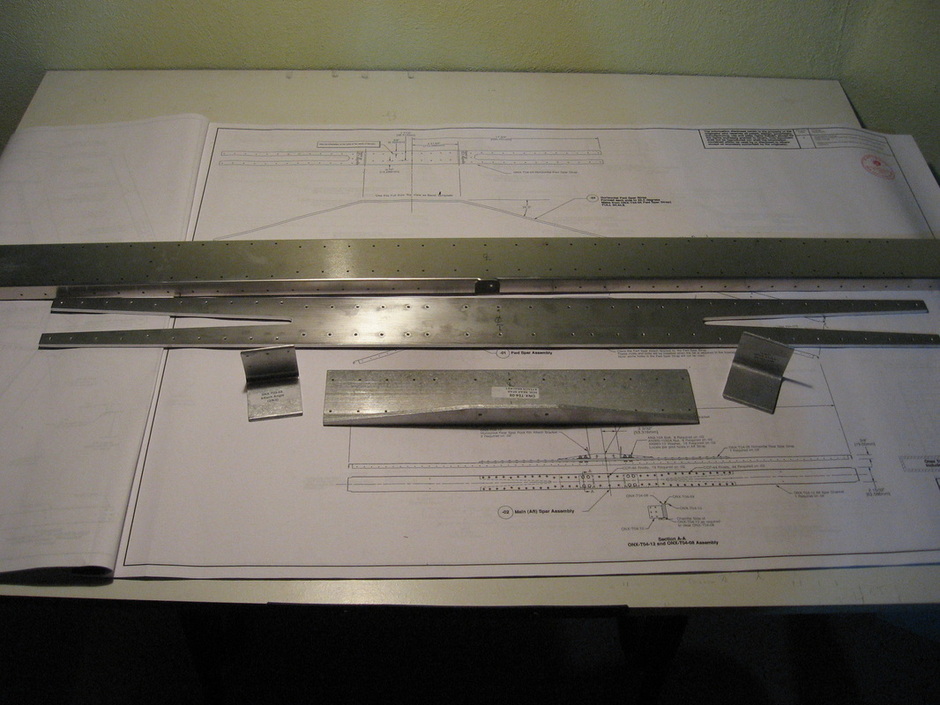
All the pieces for the aft spar assembly
1st problem
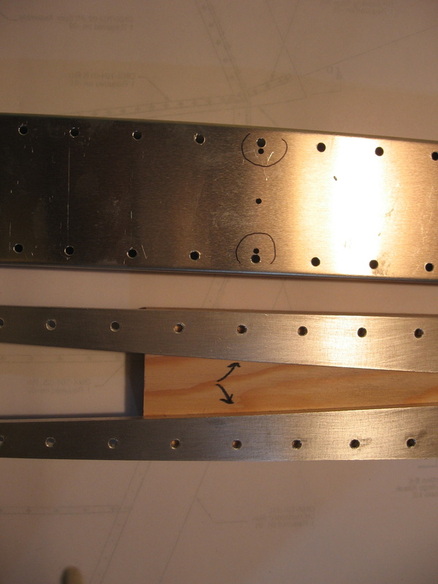
It was straight forward.Up-drill a few holes to hold all the parts together with clecos and then up drill #30 drill bit the rest of the holes,take apart and deburr front and back of each part.
It was then I discovered what is obvious in the picture.Sonex drilled the 2 holes highlighted in the wrong location on the strap(2 arrows) which means I transfered the mistake to the spar.This is where a rib is located so a quick check with the rib told me that the holes are too far apart to catch the rib.It is apparent that if I were to re-drill in the proper place that the holes would overlap creating an oblong hole.Not good.
I have contacted Sonex and sent a picture to show them the error and they said I need a new strap because I inadvertently drilled the 2 holes through the strap in the wrong place.
I recieved the new strap Nov 4.Great service!
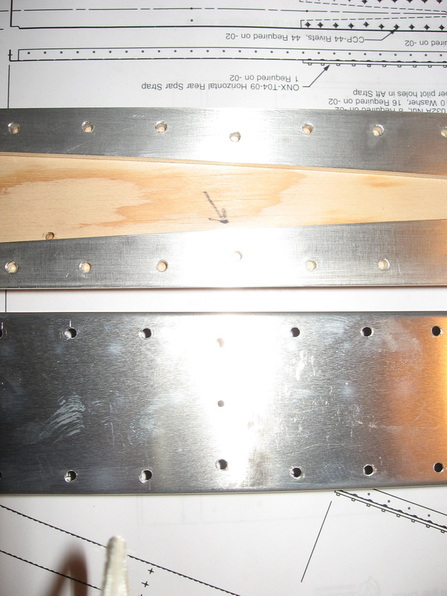
I made sure I did not up drill the same 2 holes and used the spar channel to locate the holes in the right place.Onward and upward.
The right side of the strap was drilled properly as can be seen in the picture below.
It should be noted that had I visited this page at Sonex
http://www.sonexaircraft.com/support/onex_revs.html
I would have avoided the mistake.3rd one down ........My bad.
It was then I discovered what is obvious in the picture.Sonex drilled the 2 holes highlighted in the wrong location on the strap(2 arrows) which means I transfered the mistake to the spar.This is where a rib is located so a quick check with the rib told me that the holes are too far apart to catch the rib.It is apparent that if I were to re-drill in the proper place that the holes would overlap creating an oblong hole.Not good.
I have contacted Sonex and sent a picture to show them the error and they said I need a new strap because I inadvertently drilled the 2 holes through the strap in the wrong place.
I recieved the new strap Nov 4.Great service!
I made sure I did not up drill the same 2 holes and used the spar channel to locate the holes in the right place.Onward and upward.
The right side of the strap was drilled properly as can be seen in the picture below.
It should be noted that had I visited this page at Sonex
http://www.sonexaircraft.com/support/onex_revs.html
I would have avoided the mistake.3rd one down ........My bad.
Glitch
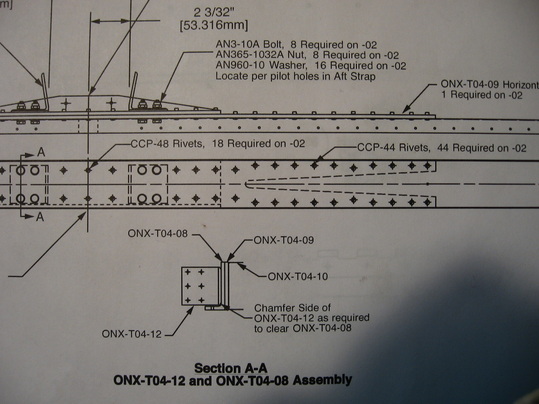
On the plans it shows all the holes riveted.Remember that a rib attaches to the 5 row in from the ends so
NO RIVETS HERE YET!
NO RIVETS HERE YET!
|
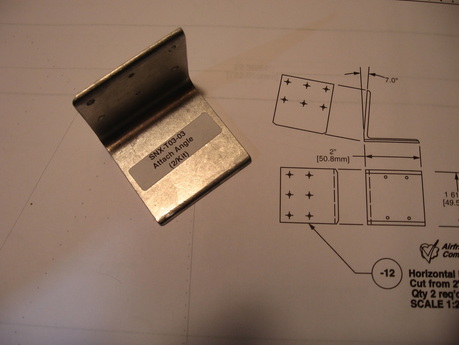
At left is one of the attach angles that attach to the rear spar.On the revisions it says that it has to be 7*.The 2 angles are 10*
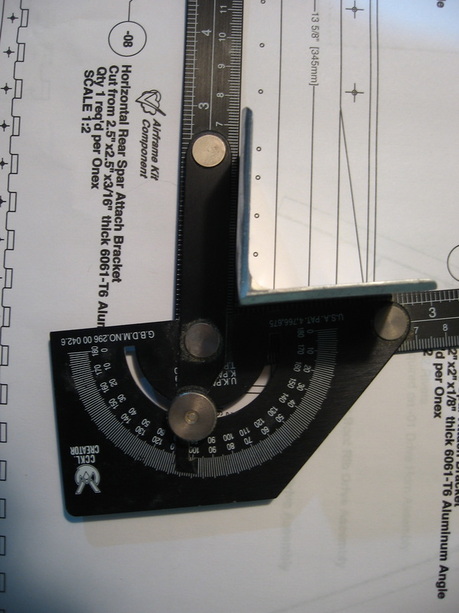
I put them in the arbor press upside down and tweaked it till i opened the angle to the 7 degrees required .Easy to assume it's already done so make sure to check.Mine were at 10 degrees. Here it is at 7* I highly recommend this steel angle check.Very precise setting ability.I also have one of those plastic ones.Waste of money.Especially in the small angle setting such as this 7* It was impossible to get the right angle locked in. |